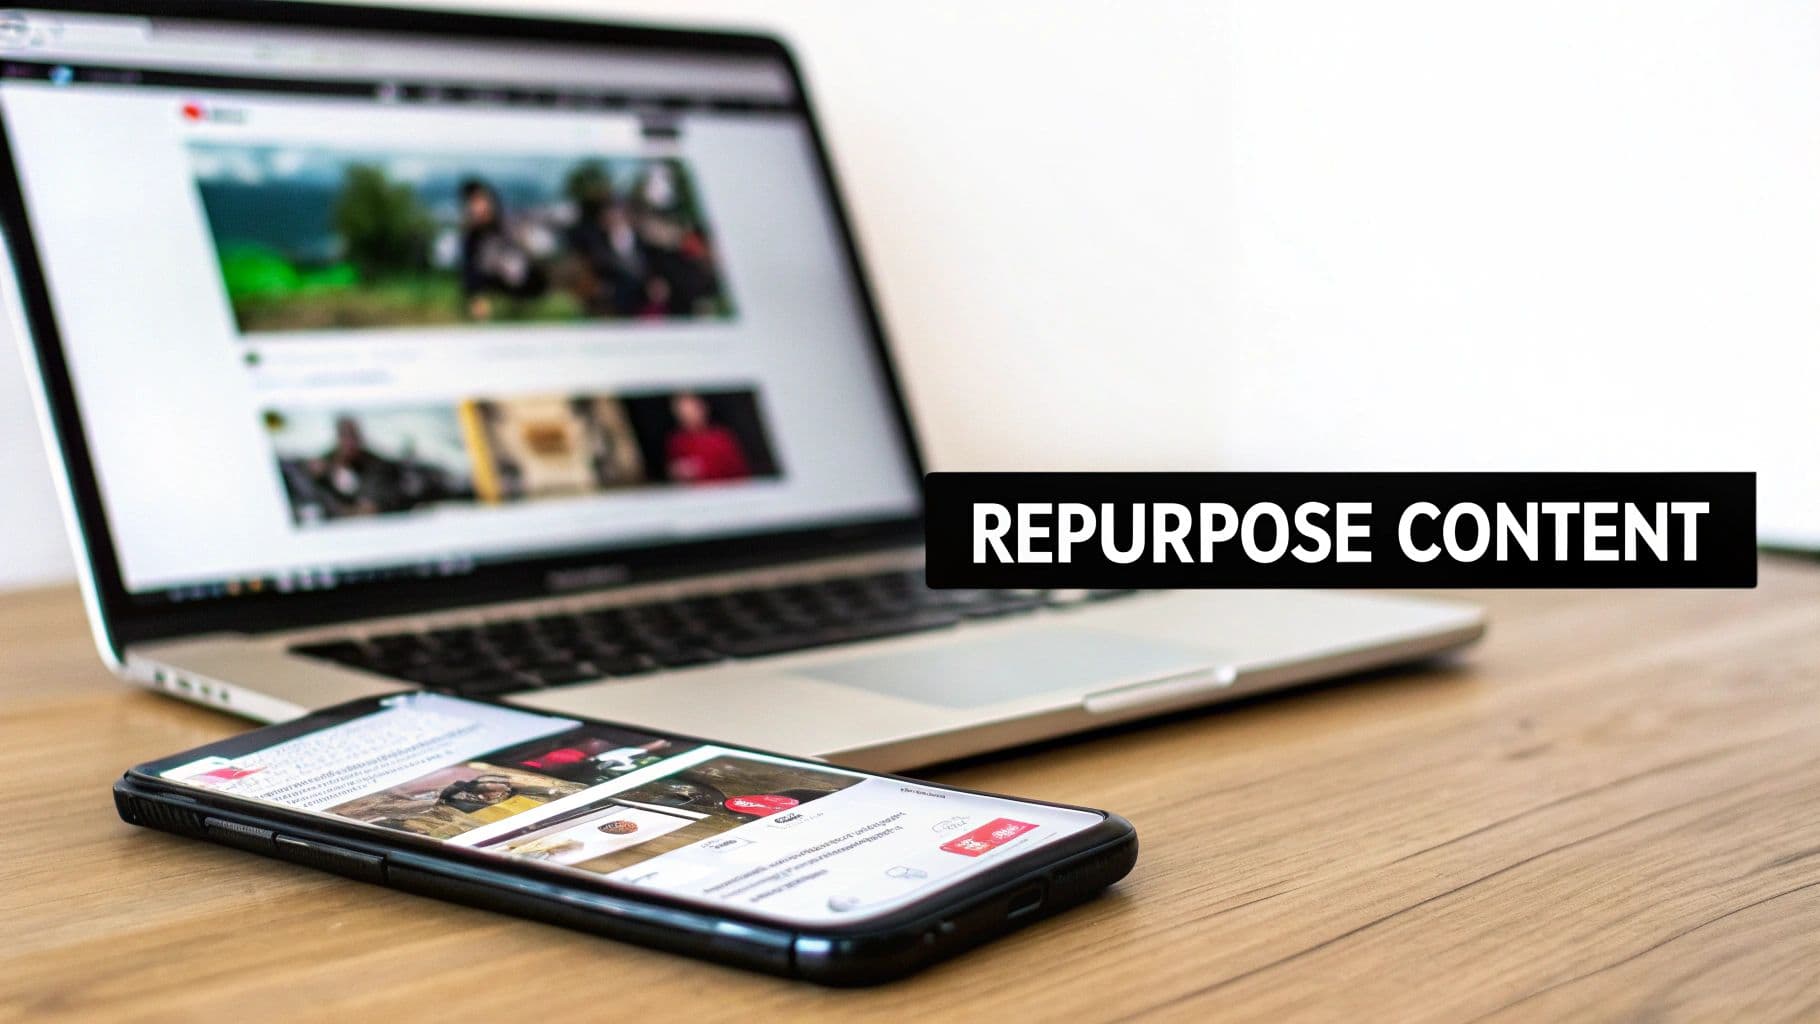
Share YouTube Video To Instagram The Right Way
Learn how to share YouTube video to Instagram as Reels, Stories, and posts. Our guide covers editing, formatting, and tools to grow your audience.
Yes, you can absolutely share a YouTube video to Instagram, but there’s a catch: you can’t do it directly. Think of it less as a simple "share" and more as a smart repurposing strategy. The whole process involves downloading your original YouTube content and then chopping it up to fit Instagram's fast-paced, vertical world of Reels and Stories.
Done right, it's a powerful way to bridge two massive, yet completely distinct, audiences.
Why Sharing YouTube Videos On Instagram Works
Turning your long-form YouTube videos into bite-sized Instagram content isn't just a time-saver; it's a core strategic move for any modern creator. This approach lets you speak to two completely different user mindsets without having to create everything from scratch.
On YouTube, you have a dedicated audience ready for a deep dive. They’ve settled in for detailed, long-form content. Instagram, on the other hand, is all about capturing fleeting attention. Users are scrolling for quick hits of value, entertainment, or inspiration.
This creates a brilliant content flywheel. Your in-depth YouTube videos build your authority and deliver comprehensive value. The snippets you pull for Instagram act as compelling trailers or standalone micro-lessons. These short, punchy clips get fed into the Reels and Explore page algorithms, introducing your brand to a whole new audience that might have never found your YouTube channel on their own.
Tapping Into Two Massive Platforms
The numbers don't lie. YouTube users are deeply engaged, spending nearly double the total time on its app compared to TikTok. That's a goldmine of proven, high-value content. By slicing up these videos, you can tap into Instagram's massive, commercially active audience, where a staggering 63% of people aged 18-34 actively follow and engage with brands.
Even better, data shows that Instagram Reels—often fueled by repurposed clips—can deliver up to 35% more engagement than standard video posts. It’s a huge opportunity.
The core idea is simple: You've already done the hard work of creating a high-value YouTube video. Now, you can extract its most impactful moments to feed Instagram's algorithm and attract a different segment of your target audience.
To help you visualize the shift in strategy, here’s a quick breakdown of how the two platforms differ.
YouTube vs Instagram Content At A Glance
This table offers a quick comparison of content formats and audience expectations to guide your repurposing strategy.
| Aspect | YouTube | Instagram (Reels/Stories/Feed) |
|---|---|---|
| Primary Format | Horizontal (16:9), long-form | Vertical (9:16), short-form |
| Content Style | Educational, detailed, storytelling | Quick, engaging, visually-driven |
| Audience Mindset | Intentional viewing, deep dives | Passive scrolling, discovery |
| Optimal Length | 8-15+ minutes | 15-90 seconds (Reels), <60 seconds (Stories) |
| Key Goal | Build authority, ad revenue, long-term value | Drive engagement, brand awareness, community |
Seeing them side-by-side makes it clear why a straight copy-and-paste approach won't work. The goal is to adapt, not just upload.
Building a Stronger Brand Presence
Consistently sharing your best YouTube moments on Instagram does more than just fill your content calendar. It builds a cohesive, resilient brand that lives across the web. Viewers who discover you through a Reel might be intrigued enough to click the link in your bio and watch the full video, driving valuable traffic back to your YouTube channel.
This cross-pollination strengthens your entire digital ecosystem. It makes your brand less dependent on a single platform's ever-changing algorithm.
To get the full picture, this practical guide to posting a video from YouTube to Instagram breaks down the technical steps. It’s one of the most effective ways to maximize the reach of every single piece of content you produce.
Getting Your YouTube Video Ready for Instagram
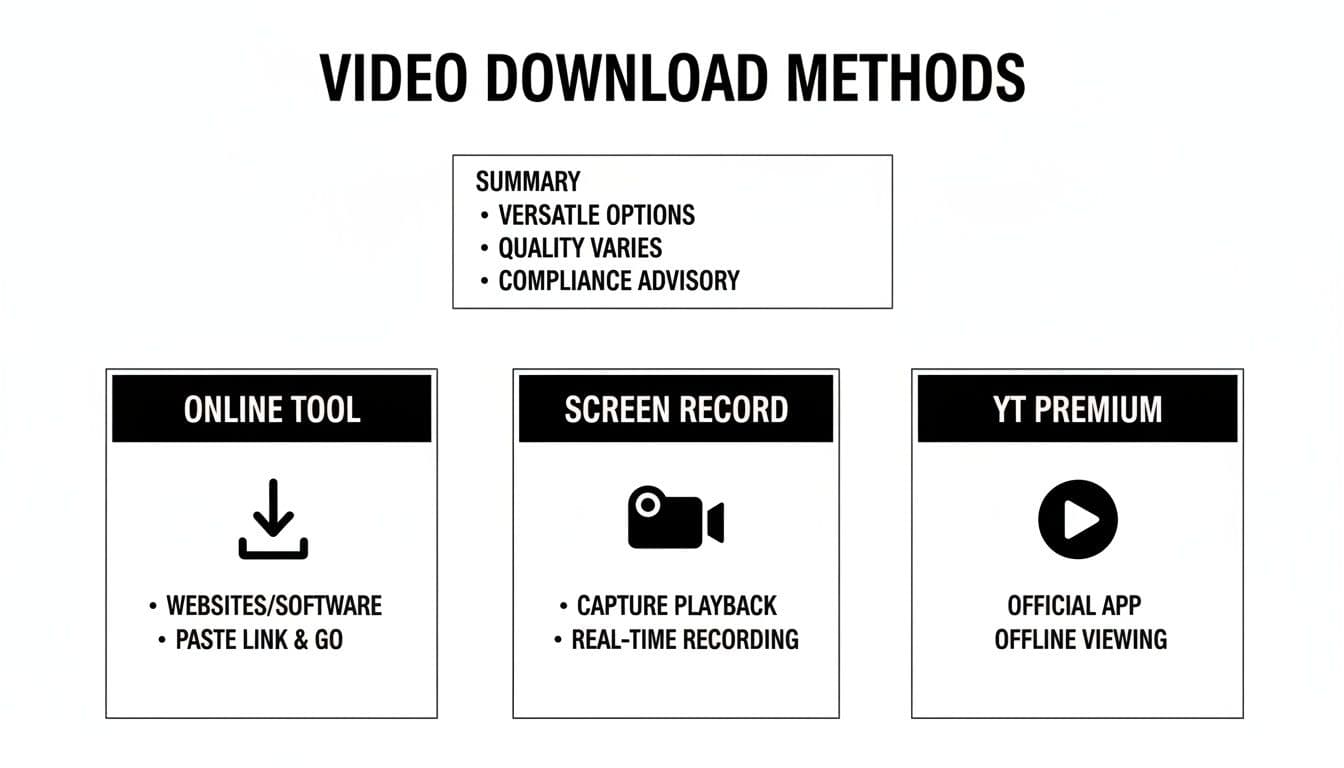
Before you can slice and dice your YouTube masterpiece into Instagram gold, you need to get your hands on the actual video file. Think of it as pulling the raw ingredients from the pantry before you start cooking. You’ve got a few ways to do this, and the best method really depends on your situation.
The absolute best-case scenario? You download it straight from your own YouTube Studio. If you’re the original creator, this is your golden ticket. Just pop into the "Content" tab, find the video you want, click the three dots, and hit "Download." This gives you the pristine, original file you first uploaded, with zero extra compression or quality loss.
But let's be real, sometimes that original file is long gone, buried on an old hard drive. Or maybe you have permission to use someone else's footage. In those cases, you’ll need another way in.
Picking Your Download Method
When downloading from YouTube Studio isn't an option, you're looking at a few different paths. Each has its pros and cons, so let's break down which one to use and when.
-
Online Downloader Websites: These are the quick-and-dirty tools. You paste the YouTube URL, and they spit out a download link. They're usually free and fast, which is great in a pinch. The catch? Quality is often a gamble. Many free sites cap you at 720p or squash the file so much it looks fuzzy on a sharp phone screen.
-
Screen Recording Software: This is the control-freak method, and I mean that in the best way. Using something like OBS Studio (free and powerful) or QuickTime (built into Macs), you can record the video as it plays in high resolution—1080p or even 4K. It takes a bit more setup, but you get to capture the best possible quality, which is a huge win.
-
YouTube Premium Downloads: If you're a YouTube Premium subscriber, you know you can download videos for offline viewing in the app. While awesome for a flight, it’s a dead end for repurposing. These files are locked in a protected format, making them nearly impossible to pull into a video editor. It's built for watching, not editing, so I'd skip this one entirely for content creation.
My Two Cents: Always, always, always start with the highest quality file you can get. Instagram is going to compress your video no matter what when you upload it. Starting with a crystal-clear source file is your best defense against the dreaded pixelation that can make your content look unprofessional.
A Quick Word on Copyright and Fair Use
Okay, this is important. Before you download any video that isn't yours, you need to know the rules of the road. A huge part of successfully repurposing content for social media is doing it legally and ethically.
Simply ripping someone else's video and posting it as your own is a huge no-no. It’s a violation of YouTube’s terms, a breach of copyright law, and can get your content taken down, your account hit with a strike, or worse.
Here’s the simple breakdown:
- It’s Your Content: If you made it, you own it. Go wild. Download and repurpose it to your heart's content.
- It’s Someone Else’s Content: You must get explicit, written permission from the original creator before you use their work. No exceptions.
- The "Fair Use" Trap: You might have heard that using short clips for things like commentary, criticism, or parody is covered by "fair use." While true in some cases, fair use is a murky, complex legal defense—not a permission slip. For a brand, relying on it is a risky gamble that can easily be challenged.
The safest, simplest, and most professional approach? Stick to repurposing your own content. It keeps you out of legal trouble and lets you focus on what matters: turning your hard work on YouTube into incredible content for Instagram.
Editing Your Video For Maximum Instagram Impact
Let’s be honest: simply dropping a horizontal YouTube clip onto Instagram is a surefire way to get ignored. A 16:9 landscape video looks clunky and out of place on a platform designed for vertical scrolling. To get any traction, you have to adapt your content to feel native to the Instagram environment.
This isn't just about getting rid of the ugly black bars on the sides. It's about respecting how people actually use the app. They hold their phones vertically. Forcing them to turn their device sideways is a huge ask—one they’ll almost never bother with. The goal is to make your repurposed content look like it was created for Instagram in the first place.
Mastering Instagram's Aspect Ratios
The first and most important edit is nailing the aspect ratio. Instagram has different rules for different placements, and this is one you can't afford to get wrong.
- Instagram Reels & Stories: These placements demand a 9:16 vertical aspect ratio. This full-screen format is the most immersive and it’s exactly what users have come to expect.
- Instagram Feed Posts: You have a bit more wiggle room here, but a 1:1 square ratio is almost always your safest bet. It takes up a good amount of screen real estate as people scroll. A 4:5 portrait format works well too, but square is classic and reliable.
When you convert a 16:9 YouTube video to 9:16, you’re obviously going to lose the sides of the original frame. Your job in the editing process is to make sure the key subject or action stays front and center. This reframing is absolutely essential to making the clip work.
This is where you start, but first, you need the actual video file. You have a few options for getting it off YouTube and onto your computer for editing.
Each method has its pros and cons regarding convenience, quality, and control. Pick the one that best preserves your video's resolution so you have a high-quality file to work with.
To help you keep things straight, here’s a quick reference table for Instagram's video specs.
Ready to create video ads?
Turn your photos into scroll-stopping ads in minutes. No video editing skills required.
Try For FreeInstagram Video Format Specifications
| Format | Aspect Ratio | Max Length | Recommended Resolution |
|---|---|---|---|
| Reels | 9:16 (Vertical) | 90 seconds | 1080 x 1920 pixels |
| Stories | 9:16 (Vertical) | 60 seconds | 1080 x 1920 pixels |
| Feed Post | 1:1 (Square) or 4:5 (Portrait) | 60 minutes | 1080 x 1080 or 1080 x 1350 pixels |
| Live | 9:16 (Vertical) | 4 hours | 1080 x 1920 pixels |
Bookmark this page or save this table. It’s a lifesaver when you’re in the middle of an edit and can’t remember the exact numbers.
The Art of the Hook and Clip Selection
People on Instagram have the attention span of a goldfish. You don't have a few minutes to build up to your point like you do on YouTube. Your clip has to grab them and deliver value within the first three seconds.
Forget the long intros and warm-ups. Your job is to hunt down the single most compelling, hilarious, or shocking 15-to-30-second chunk from your entire YouTube video. Think of it as the highlight of the highlights—a micro-moment that makes someone stop their scroll cold.
The total length matters, too. While Reels can technically run up to 90 seconds, the sweet spot for engagement is usually much, much shorter. For a full breakdown on this, check out our guide on how long is instagram story, as the core ideas apply to Reels as well. You're aiming for something punchy and easily re-watchable.
Captions Are Not Optional
A huge percentage of people watch Instagram videos with the sound off. It’s just the default behavior. So, if your video has someone talking, you absolutely have to add burned-in captions (subtitles). Without them, your message is completely lost on most of your potential audience.
This isn’t just an accessibility nice-to-have; it's a fundamental engagement strategy. Tools like CapCut or Veed make adding text incredibly easy, and even Instagram's own sticker feature gets the job done. Clear, readable captions ensure your content is understood by everyone, which dramatically boosts its impact and shareability. It’s a tiny step that makes a world of difference.
Streamlining Your Workflow With AI Tools
Manually downloading, cropping, and captioning every single clip is a massive time sink. It gets the job done, sure, but that traditional editing grind quickly becomes a bottleneck, especially if you're a solo creator or a small team trying to keep up a consistent posting schedule.
This is where modern AI video tools completely change the game.
Instead of wrestling with timelines and keyframes, these platforms offer a much faster path from your long-form video to a polished, Instagram-ready post. Imagine feeding an AI key moments—or even just high-quality stills—from your YouTube video and getting back a cinematic, vertical Reel in minutes.
This approach lets you skip right over the tedious, repetitive parts of video editing. For marketers and performance advertisers, this is huge. It means you can test multiple video concepts and creatives at a scale that would be completely impossible with manual methods.
How AI Simplifies Video Repurposing
The big idea behind tools like Proom AI is to automate the creative process using templates built for specific industries. You're not starting from a blank canvas.
You kick things off by picking a template designed for your goal—maybe a product feature, a real estate tour, or a portfolio showcase. Then, you upload your assets. These could be short B-roll clips or just high-quality photos from your original YouTube production. From there, the AI takes the wheel.
- Automatic Formatting: The AI instantly reframes your assets into the correct vertical 9:16 aspect ratio. No more manual cropping.
- Cinematic Edits: It applies dynamic transitions, effects, and pacing to give your content that engaging, professional feel.
- AI Scripting: Many tools can even generate compelling hooks, captions, and calls-to-action for you.
This screenshot from Proom AI's homepage shows just how simple its image-to-video workflow is. It's all about turning your static assets into dynamic video ads without ever opening complex editing software. For teams that need to move fast, that's a major advantage.
Cross-platform video sharing has totally reshaped how people discover products. In fact, over 55% of consumers now find new brands through social video.
With Instagram’s massive ad reach of 1.91 billion users, using AI to quickly generate share-ready videos is a massive competitive edge. This is especially true in e-commerce, where 44% of users see Instagram as a key channel for finding new products.
Scaling Your Content Production
The real magic of an AI-driven workflow is scalability. A single person can now produce a high volume of video variations to see what truly connects with their audience.
For creators, this means you spend less time on the mind-numbing editing tasks and more time on high-level strategy and making the core long-form content that drives your YouTube channel.
This shift is crucial for staying competitive. You can maintain a constant presence on Instagram with fresh, high-quality video without burning out yourself or your creative team.
If you're looking to explore more options, you might be interested in our guide on the best AI tools for content creators, which breaks down a range of solutions for different needs. This automated approach isn't some futuristic concept anymore; it's a practical solution for today’s content demands.
Writing an Instagram Post That Actually Engages People

You've got a perfectly edited, vertical-friendly video clip ready to go. Awesome. But the job isn't done yet. This is the part that so many people rush, and it’s a huge mistake.
The final step—actually crafting the post—is what separates a video that gets a few mindless views from one that drives real action. A great video without a compelling caption, smart hashtags, and a clear call-to-action is just a billboard with no text. It might look nice, but it’s not going to hit your goals.
Let's break down how to tie it all together.
Write Captions That Start Conversations
Your caption's job isn't to just describe the video. It's to start a conversation. You have to get out of the habit of saying, "Here's what this video is about." That’s a snoozefest.
Instead, pull your audience in with a hook—a question or a bold statement that relates to the clip they just watched. If your video is a quick tutorial, don’t just say, "Here's a quick tutorial." Ask something like, "What's the one technique you struggle with most? Drop it in the comments!" That simple switch turns a passive scroll into an active interaction.
Another great tactic is to add extra context or a personal story that wasn't in the video. This gives people a reason to actually read the caption and builds a much deeper connection.
Key Takeaway: Your caption should add value, not just repeat what’s in the video. Use it as a tool to prompt comments, share behind-the-scenes details, or offer a new perspective.
If you want to dive deeper into fostering this kind of interaction, check out our guide on how to increase social media engagement.
Nail Your Hashtag Strategy
Hashtags are your video's express ticket to the Explore page, but spamming a bunch of popular tags is a waste of time. You need a balanced strategy. I always recommend a mix of broad, niche, and branded hashtags to cast the widest relevant net.
Here’s my go-to formula:
- Broad Hashtags (1-2): These are the high-volume heavy hitters like
#videomarketingor#contentcreation. They’ll give you a quick visibility spike, but your post can get buried in minutes. Use them sparingly. - Niche Hashtags (3-5): This is where the magic happens. Think more specific, like
#youtubetoinstagramor#repurposingcontent. The audience is smaller, but they're way more targeted and engaged. This is how you find your people. - Branded Hashtags (1-2): Create a unique tag for your business, like
#ProomAITips. It helps you build a library of your own content and encourages your community to use it, too.
Do a little recon. See what hashtags similar, successful accounts in your space are using. The sweet spot is usually between 5 and 10 total hashtags that are genuinely relevant to what your video is about.
Drive Action With a Crystal-Clear CTA
Every single post needs a purpose. What do you actually want people to do after they watch your video? If you don't tell them, they'll just keep scrolling. Your Call-To-Action (CTA) needs to be direct and dead simple to follow.
Here are a few CTAs that work like a charm for repurposed YouTube clips:
- "Watch the full video now! Link in bio." (The classic for a reason—it directly drives traffic back to YouTube).
- "What do you think of this tip? Let me know in the comments." (Perfect for boosting on-platform engagement).
- "Tag a friend who needs to see this!" (Encourages sharing and expands your organic reach).
- "Save this post for later!" (A powerful signal to the Instagram algorithm that your content is valuable).
Pick one primary CTA and stick to it. Don't ask them to comment, tag, save, and click the link. That's way too much to ask. Be explicit about the one thing you want them to do, and you'll turn that video from just another piece of content into a real marketing asset.
Got Questions About Turning YouTube Videos into Instagram Content?
Even when you have a solid plan, chopping up a YouTube video for Instagram can feel like navigating a minefield. There are a few common hangups and gray areas that trip people up. Let's clear the air on the biggest ones so you can get back to creating.
So, Can I Legally Share Someone Else's YouTube Video?
Let's make this simple: no, not really.
Grabbing content you didn't create and posting it as your own, even a short clip, is copyright infringement. The only truly safe, professional, and headache-free approach is to only repurpose videos that you own or have an explicit license to use.
You might hear people throw around the term "fair use," especially for commentary or review clips. But "fair use" is a complicated legal defense, not a permission slip. For any brand, trying to hide behind it is a massive and unnecessary risk.
The best policy is to stick to your own content. Period. It completely sidesteps any legal drama and guarantees that everything you post is perfectly aligned with your brand's voice and message.
What’s the Perfect Length for an Instagram Reel?
Instagram lets you make Reels up to 90 seconds long, but don't feel obligated to use all that time. In fact, you probably shouldn't.
For repurposed clips, the real engagement sweet spot is often much, much shorter—think 7 to 15 seconds.
Your goal isn't to cram your entire YouTube video into a Reel. It's to find that one golden nugget—the most impactful, surprising, or visually stunning moment—and let it shine. You want to create a punchy, re-watchable loop that delivers a single, powerful idea in a flash. If your point takes longer to make, consider a carousel post with multiple short video clips instead of one long Reel that loses steam.
How Do I Actually Get a Clickable YouTube Link on Instagram?
This is the big one. Instagram is notoriously stingy with clickable links in post captions. You can't just paste a URL into your Reel's description and expect it to work.
There are really only two good ways to get people from your post to the full video:
-
The "Link in Bio" Classic: This is the go-to method for a reason. Put the direct link to your YouTube video (or your whole channel) right in your Instagram bio. Then, make your post caption a clear call-to-action, telling people exactly what to do. Something like: "Watch the full breakdown now—link in bio!"
-
The Story Link Sticker: If you have access to this feature (often tied to follower count or verification), you can add a direct, tappable link to your Instagram Stories. It's the most direct route, sending viewers straight from your Story to your YouTube video with a single tap.
Will Downloading My YouTube Video Ruin the Quality?
It definitely can, so you have to be smart about it. The quality drop usually happens when you use those free, sketchy browser-based downloader sites. They often crush your file's quality to save their own bandwidth.
To keep things looking crisp, use a proper downloader app that lets you choose the resolution. Always aim for 1080p if it's an option. Another great trick is to simply screen record your own video playing at the highest resolution. Remember, you want to start with the best possible source file because Instagram is going to compress it again on their end when you upload.
Ready to turn your best photos and video clips into stunning, Instagram-ready ads without the manual editing? Proom AI uses industry-specific templates to generate cinematic videos in minutes. Stop wrestling with aspect ratios and start creating content that converts. Create your first video for free with Proom AI.
Ready to create video ads?
Turn your photos into scroll-stopping ads in minutes. No video editing skills required.
Try For Free