Image Sequence to Video: Complete 2026 Guide
Turn sequence of images to video in 3 clicks. Compare 5 tools (free & pro) with real output examples. Perfect loops & motion effects in minutes →
Turning your photos into a video isn't just a neat trick—it's one of the smartest marketing plays you can make right now. You’re taking assets you already have, like product shots or portfolio images, and breathing life into them to tell a dynamic, engaging story. This is a must-have skill for anyone trying to cut through the noise online.
Why Bother Turning Images Into a Video?
Let's be honest, in a feed overflowing with content, a static image can easily get lost. Our brains are hardwired to notice movement, which is exactly why video consistently crushes static photos in engagement, retention, and, most importantly, conversions.
When you arrange a series of high-quality photos into a video, you're not just showing something; you're creating a narrative. You can guide the viewer's eye, build anticipation, and tell a much richer story than a single snapshot ever could. This isn’t just about making things look cool; it’s about driving real business results. A video can showcase a product from every angle, walk through a process, or deliver a powerful before-and-after transformation. For an e-commerce brand, that means a customer can see how a chair looks from all sides in a real room, giving them the confidence to click "buy."

AI Just Made Video Creation Incredibly Easy
The best part? You no longer need a Hollywood budget or a degree in video editing to pull this off. AI-powered tools have completely changed the game, making professional-grade video creation accessible to literally everyone. Platforms like Proom AI were built from the ground up to make turning a sequence of images to video a simple, three-step process.
This technology solves the biggest headache for small teams and solo entrepreneurs: time. What used to take hours of tedious editing can now be done in minutes.
The AI video generator market is exploding for a reason. It's projected to rocket from USD 788.5 million in 2025 to USD 3,441.6 million by 2033. This surge is fueled by insane demand from marketers, especially since 84% of consumers are asking for more videos from brands. You can dig into the numbers in Grand View Research's market analysis.
The Real-World Payoff for Marketers and Brands
Jumping on this strategy gives you some serious, tangible advantages. The ability to churn out video content quickly means you can A/B test your ads more effectively to see what messaging truly clicks with your audience. It also opens up a whole new world of content for video-first platforms like Instagram Reels and TikTok, where static images just don't perform.
Here’s what you can realistically expect:
- Sky-High Engagement: Videos grab attention and hold it, which translates directly to more likes, comments, and shares on social media.
- Better Storytelling: You can build a proper narrative arc, taking your audience from a problem to your solution in a compelling way.
- Stronger Ad Performance: Time and time again, dynamic video ads outperform static banner ads with higher click-through rates and more conversions.
- Huge Time and Cost Savings: AI tools slash your production overhead, letting you create more high-quality content without burning through your budget or your calendar.
Preparing Your Images for a Flawless Video
The secret to a video that looks sharp and professional often happens before you even think about hitting “render.” It’s all in the prep work. Starting with a solid foundation of well-chosen and properly optimized images is what separates a polished final product from a clunky, amateur-looking slideshow.
Getting this part right ensures your video doesn’t just look good, but actually tells a coherent story.
The first rule is non-negotiable: always start with high-resolution images. You can always scale a picture down without losing quality, but you can’t blow up a small, pixelated image and expect it to look crisp. Low-quality source images guarantee a blurry, unprofessional video, especially when it’s viewed on a bigger screen. This initial quality check is the single most important thing you can do for your brand's perception.
Curate Your Images for Storytelling
Your goal here isn't just to dump a folder of photos into a timeline; you’re guiding the viewer on a journey. Think like a director.
If you're creating a video for a real estate property, the sequence should feel like a natural walkthrough. You might start with a wide shot of the exterior, move to the entryway, flow into the main living spaces, show off the kitchen, and end with the bedrooms. This creates a virtual tour that feels intuitive and real.
For a product, the narrative could be different. Maybe you arrange the images to show it from multiple angles, followed by close-ups on key features, and then finish with shots of it being used. This approach turns a simple showcase into a powerful visual argument for why someone should buy it.
Your image sequence is your script. Each photo is a scene that should build on the last, creating momentum and keeping the viewer engaged. Without a logical flow, you risk confusing your audience and losing their attention before you get to the good part.
Maintain Visual Consistency
A smooth viewing experience depends heavily on visual consistency. Abrupt, jarring changes in lighting, color, or style can pull your viewer right out of the experience and distract from your message. Before you even think about uploading, take a minute to make sure your photos feel like they belong in the same family.
Here are a few key things to check for:
- Lighting and Exposure: Make sure all your photos have similar brightness levels. An image that's way darker or brighter than the one before it will feel like a mistake and break the flow.
- Color Grading: Applying a consistent color filter or preset across all your images is a pro move. This gives your video a cohesive, branded look, whether you’re going for a warm and inviting vibe or something more cool and modern.
- Composition and Framing: While you want variety, try to maintain a consistent style. If you’re using a lot of close-ups, make sure you balance them with medium and wide shots. The whole sequence should feel intentional, not random.
Now, let's talk about choosing the right file format. Not all image files are created equal, and picking the right one can make a big difference in both quality and performance.
Image Format Quick Guide for Video Creation
Here’s a quick rundown of the most common image formats to help you decide which is best for your video project. The right choice often comes down to balancing quality against file size.
| Format | Best For | Key Consideration |
|---|---|---|
| JPEG | Photos with complex colors and gradients (e.g., real estate, product shots). | The most common format. Uses lossy compression, so save at the highest quality setting to avoid artifacts. |
| PNG | Graphics, logos, or images that need a transparent background. | Uses lossless compression, so quality is higher than JPEG, but file sizes are much larger. Overkill for standard photos. |
| WEBP | A modern format great for balancing quality and small file size. | Offers excellent compression but isn't as universally supported by older software as JPEG or PNG. |
| HEIC | High-efficiency format used by Apple devices. | Delivers great quality at a smaller size than JPEG, but you may need to convert it for compatibility with some video editors. |
Ultimately, for most photo-to-video projects, a high-quality JPEG is your best bet. It provides an excellent balance of quality and manageable file size.
One last critical step is ensuring your images are the correct size and aspect ratio for your final video format. Cropping and resizing them beforehand gives you more control. For this, using an Image Resizer tool can be a huge time-saver, especially if you’re processing a bunch of images at once.
By investing a little time in preparing your assets, you set the stage for a video that not only looks fantastic but also hits its strategic goals.
Choosing the Right Canvas for Your Video Story
With your images prepped and polished, it’s time to decide on the stage for your video. This isn't just a technical step; it’s a creative one. You're choosing the aspect ratio and template that will shape how your audience experiences the final product, whether they're watching on a huge YouTube screen or scrolling through TikTok.
Getting the aspect ratio—the relationship between the video's width and height—right from the get-go is critical. It saves you from dealing with awkward crops or ugly black bars later and makes your video feel native to whatever platform it lives on. Each social network has its preference, and playing by its rules can make a huge difference in performance.
Decoding Common Aspect Ratios
Think of the aspect ratio as your canvas size. A sprawling landscape painting hits differently than a tall, narrow portrait, and the same idea applies to video.
Here’s a quick rundown of the big three:
- 16:9 (Horizontal): This is the classic widescreen format, the standard for platforms like YouTube and Vimeo. It’s perfect for detailed portfolio walkthroughs, cinematic brand stories, or anything you want to feel expansive and professional on a desktop monitor.
- 9:16 (Vertical): Welcome to the world of mobile. This tall format is non-negotiable for Instagram Reels, TikTok, and YouTube Shorts. It completely fills a phone screen, creating a much more immersive experience that is proven to grab and hold attention.
- 1:1 (Square): The original Instagram format is still a workhorse for the main grid and the Facebook feed. It takes up more vertical screen space than a horizontal video while scrolling, making it a solid, reliable choice for social media ads and announcements.
But this isn't just about following rules. A 9:16 video on Reels can make a real estate property feel incredibly grand and spacious, emphasizing high ceilings. At the same time, a 16:9 version might be better for a website banner to show off the home's sprawling layout. The canvas shapes the story.
Ready to create video ads?
Turn your photos into scroll-stopping ads in minutes. No video editing skills required.
Try For FreeSelecting a Template That Amplifies Your Message
Beyond the shape, your template choice sets the entire mood and rhythm of your video. It’s how you inject your brand’s personality directly into the sequence of images to video. A good template isn't just a container; it's a creative head start, giving you pre-built transitions, text animations, and a visual flow that works.
This chart breaks down the key pillars of image prep—all of which directly impact how well your photos will work within any given template.
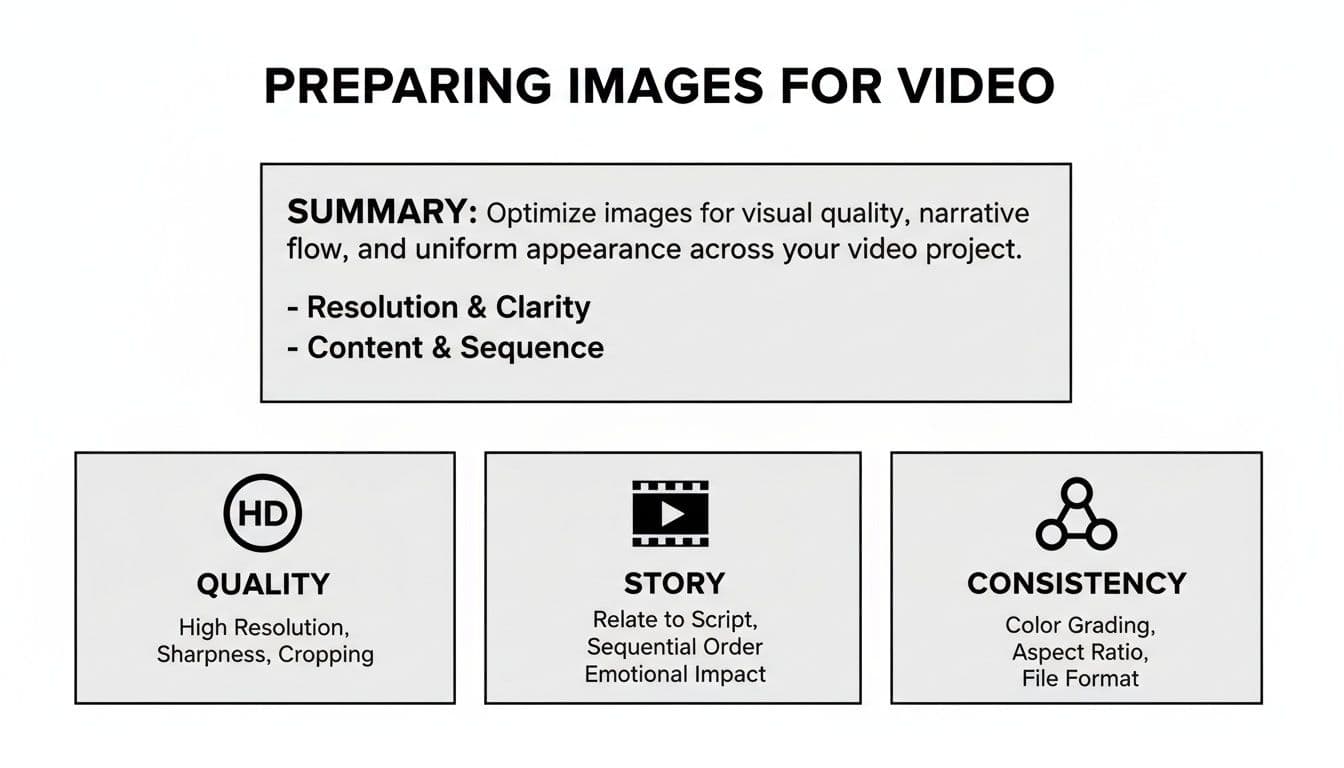
As you can see, having high-quality, consistent images that tell a clear story is the foundation. Your template and aspect ratio are built on top of that.
Let’s say you’re launching a new tech gadget. You’d probably want a template with quick cuts, punchy text, and an energetic vibe. On the other hand, an interior designer showcasing a serene living room would go for a template with slow, elegant fades and classic typography.
Tools like Proom AI offer a whole library of industry-specific templates built for exactly these scenarios, so you aren't starting from a blank slate. You can dive deeper into how AI makes this so much easier in our guide to turning photos into videos with AI.
Don't just pick a template that looks cool. Ask yourself: "Does this style match my brand's voice and the emotional response I want from my viewer?" The right template makes your message clearer, not just louder.
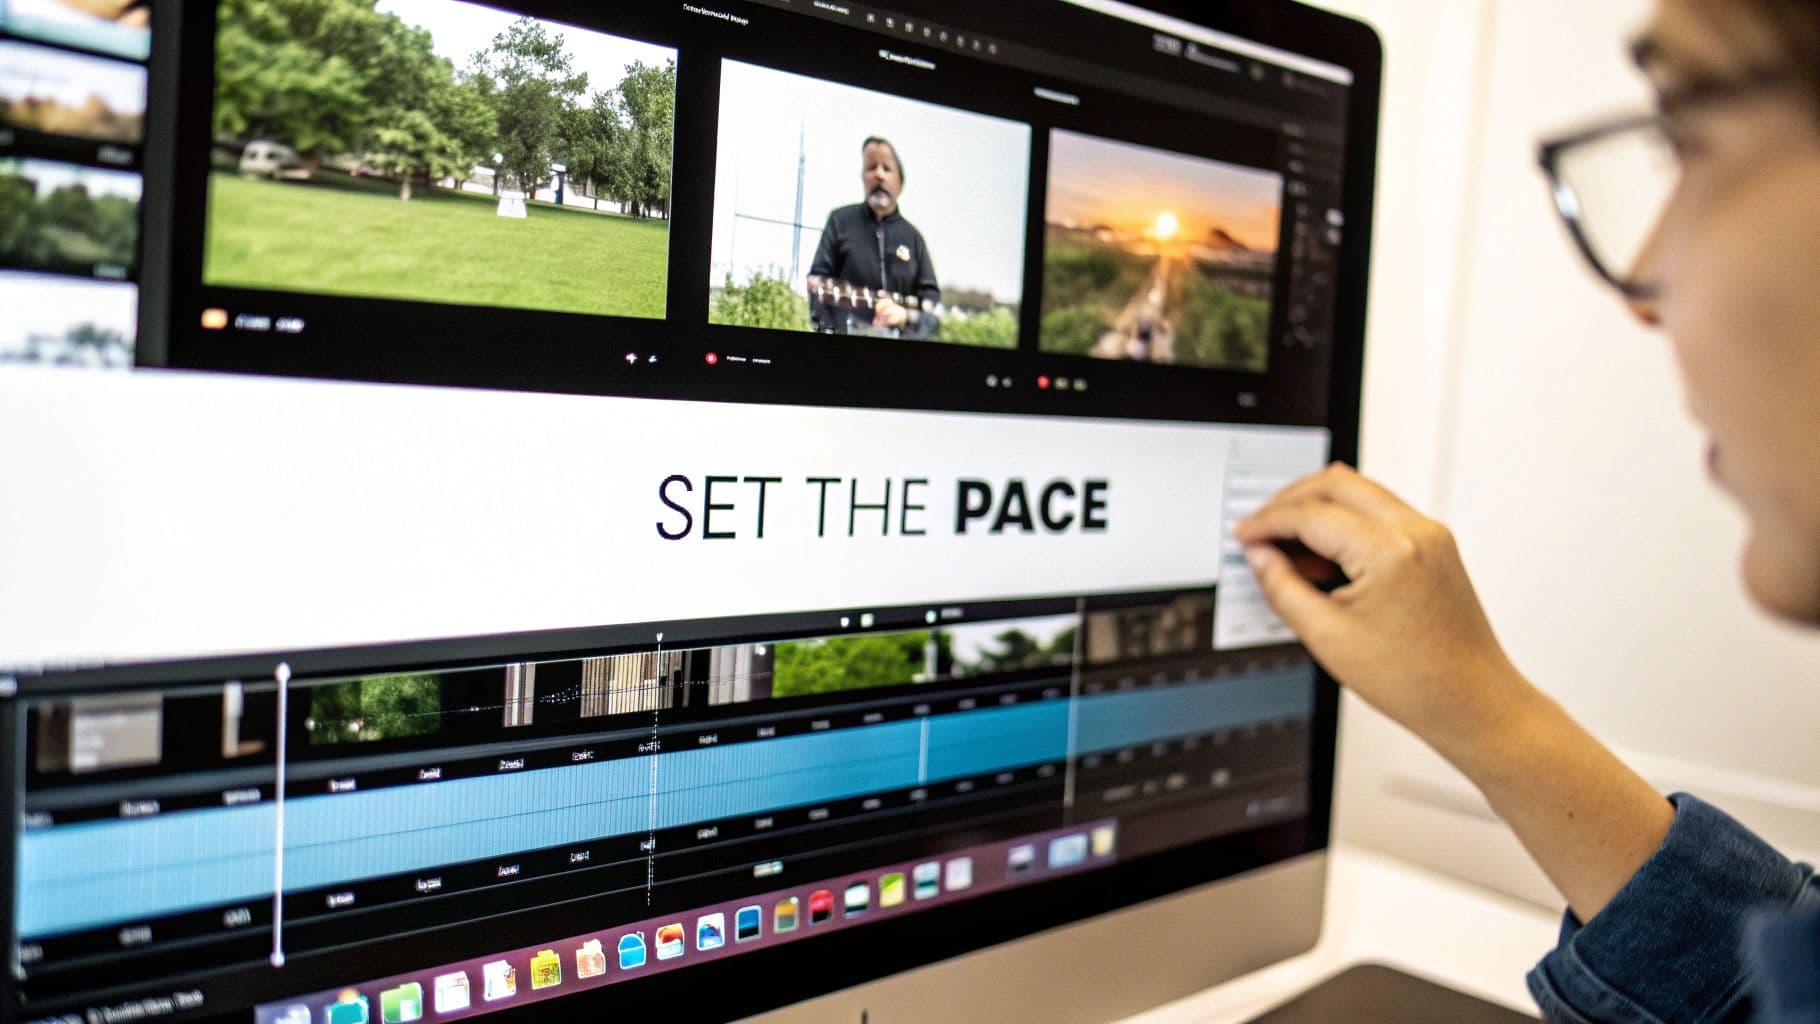
Mastering the Pace with Timings and Transitions
A great video has a rhythm, and you’re the conductor. The entire pace and flow are dictated by two simple things: how long each image stays on screen and how you get from one to the next. Getting these timings and transitions right is what turns a basic sequence of images to video into a story that actually connects.
This isn’t about hitting an "apply to all" button and calling it a day. It’s about making deliberate choices that match your goal. Are you trying to build hype for a flash sale? Or are you aiming for a more thoughtful, emotional vibe for your brand story? The answer changes everything.
Setting Your Image Duration
The duration of each image is the heartbeat of your video. There's no single "correct" timing—it all comes down to the platform and what you're trying to achieve. On places like TikTok and Instagram Reels, you have just a few seconds to make an impact, so fast, energetic pacing is king.
For something like a social media ad or a product reveal, you’ll want to lean into quick cuts.
- 1-2 Seconds Per Image: This is your go-to for building excitement. It's perfect for firing off a bunch of product shots or features in a short window, keeping the viewer’s eyes glued to the screen.
On the other hand, a slower pace gives your audience a moment to breathe and really take in the details. This works much better for things like portfolio pieces, real estate walkthroughs, or brand stories where you want to create a more relaxed, immersive mood.
- 3-5 Seconds Per Image: This more considered pace lets people study the craftsmanship of a product or soak in the atmosphere of a beautiful room. It lets the quality speak for itself.
Choosing Transitions That Enhance the Story
Transitions are the bridges between your images, and they need to be just as intentional as your timings. A cheesy, out-of-place transition can make your entire video feel cheap, but the right one can guide the viewer's eye so smoothly they don’t even notice it.
Think of them like punctuation. A simple cut is a period. It's direct, clean, and gets the job done. It’s the most common transition for a reason and works perfectly for fast-paced edits where you need to keep the momentum going.
Your transition choice should always serve the narrative. A smooth fade can signal a gentle shift in mood or time, while a more dynamic slide or wipe can add a burst of energy. The key is to avoid using flashy effects just for the sake of it.
Here are a few workhorse transitions and when to use them:
- Fade (to black or white): Gives you a soft, elegant feel. It’s great for the beginning or end of a video, or for creating a pause between different chapters of your story.
- Dissolve/Crossfade: This is where one image gently blends into the next. It creates a smooth, almost dreamlike effect that's fantastic for connecting related visuals, like showing a room before and after a redesign.
- Slide/Wipe: These add a clear sense of movement and direction. They're perfect for energetic product showcases or tutorials where you're revealing information step by step.
By carefully choreographing your image durations and transitions, you’re in complete control of the video's rhythm. You're not just slapping photos together; you're orchestrating an experience that guides your audience’s attention and leads to a far more polished, professional final cut.
Bringing Your Video to Life with Audio and Text
Let's be honest: great visuals make people stop scrolling, but it's the sound and text that actually sell the story. These finishing touches are what elevate a simple slideshow into a professional video that gets people to click, buy, or book a call.
A silent video is an ignored video. And without clear text, your message gets completely lost in the noise. Adding these final layers transforms a basic sequence of images to video into a compelling narrative that guides your viewer's attention and tells them exactly what to do next.
Crafting Captions That Convert
Think of your text overlays as the most valuable real estate in your video. With so many people watching social media clips on mute, your words have to do the heavy lifting—acting as both a narrator and a guide.
You absolutely have to land a powerful hook in the first three seconds. This could be a direct question like, "Tired of cluttered spaces?" or a bold claim like, "This is the last chair you'll ever need to buy." Whatever you choose, keep your sentences short, punchy, and incredibly easy to read on a small screen.
Here’s a practical approach I always recommend:
- One Idea Per Scene: Don't try to cram everything in at once. Dedicate each text overlay to a single, clear point that reinforces what the viewer is seeing.
- Benefits Over Features: Instead of just stating a fact like, "Made with solid oak," frame it as a benefit: "Built to last for generations." People buy solutions, not specs.
- A Crystal-Clear Call-to-Action (CTA): End your video by telling people precisely what you want them to do. Use direct, unambiguous language like "Shop the Collection Now" or "Book Your Free Consultation."
Setting the Mood with Music
Music is an emotional shortcut. The right track can instantly make your brand feel energetic and exciting, or sophisticated and trustworthy, without you having to say a single word. It’s simple psychology. An upbeat, rhythmic track builds hype for a product launch, while a slow, ambient piece creates a sense of calm and elegance for a design portfolio.
The key is to find music that complements the visuals, not overpowers them. Thankfully, many AI video tools, including Proom AI, have built-in libraries of royalty-free music you can filter by mood, genre, or use case. This takes all the legal headaches and guesswork out of the equation. We dive deeper into this in our guide on how to make a video from photos with music.
A classic mistake is picking a song you personally love instead of one that serves the video's actual goal. Always step back and ask, "What feeling do I need my ideal customer to have?" Your workout playlist probably isn't the best marketing tool.
The Power of Voiceovers and AI Presenters
Sometimes, music isn't enough. A human voice adds a layer of authority and connection that an instrumental track just can't match. A good voiceover can explain complex details, guide the viewer through a process, or simply add a warm, personal touch that builds immediate trust.
This is where AI presenters and voiceovers have become game-changers. You can generate a crystal-clear, professional voiceover in minutes, selecting from different genders, accents, and languages to perfectly match your brand’s voice and reach a global audience.
For example, an e-commerce brand can use a friendly, conversational AI voice to walk a customer through a product's best features, making the video feel less like an ad and more like a helpful recommendation. This final touch makes your content far more accessible and dramatically more engaging, ensuring your message is not just seen, but actually heard and understood.
Getting Your Video Ready for the World
You’ve done the creative work—arranging your images, nailing the timing, and adding those crucial finishing touches. Now it’s time to get your video ready for prime time. This last step is all about exporting and optimizing, making sure your creation looks flawless no matter where your audience sees it.
Don't let the technical jargon scare you. Terms like "resolution" and "frame rate" might sound complex, but they're just simple settings that control your video's quality and smoothness. Luckily, most modern tools have presets that make this part a breeze.
Nailing Your Export Settings
Think of exporting as the final quality check before you ship. For pretty much anything you'll post online, from YouTube to your e-commerce site, you want to stick with a resolution of 1080p (1920x1080 pixels). This is the sweet spot—it gives you a crisp, professional look without creating a massive file that’s a pain to upload and stream.
Next up is the frame rate, measured in frames per second (fps). This dictates how smooth the motion in your video feels. For a video made from a sequence of images, 30 fps is perfect. It delivers a clean, fluid look that’s standard for online content. Stick with these two settings, and you're golden.
One Last Look: Your Pre-Export Checklist
- Typos Kill Credibility: Double-check every single caption. A small spelling mistake can make a big project feel unprofessional.
- Audio Check: Put on headphones and listen. Is the music too loud? Does it drown out your voiceover? Get the balance right.
- Clear Call-to-Action: Is your CTA obvious? Does the viewer know exactly what you want them to do next?
- The Mobile Test: This is non-negotiable. Watch the entire video on your phone. Can you read all the text? Are any important visuals getting awkwardly cropped?
Smart Tweaks for Every Platform
A one-size-fits-all approach to video rarely works. To really get the most out of your work, you need to tailor the final video for each specific platform. For social media ads, this often means creating a couple of variations for A/B testing. You could try two different hooks in the first three seconds or test two different CTAs to see what performs best.
Here's a tip that can dramatically boost your mobile engagement: burn the captions directly into the video. A huge number of people watch videos on their phones with the sound off. If your message relies on audio, it's getting lost. Embedded captions ensure everyone gets the message, every time.
And if you want to push your reach even further, especially on social media, tapping into User-Generated Content (UGC) platforms can be a brilliant way to get your content in front of fresh, relevant audiences. At the end of the day, it's all about making your video as easy to watch and share as possible. We actually dive deeper into what makes content shareable in our guide on what makes a video go viral.
Ready to skip the complexity and turn your photos into high-impact video ads in just a few clicks? With Proom AI, you can create professional, engaging videos—complete with music, captions, and AI voiceovers—in minutes.
See for yourself how simple it is to bring your brand’s story to life.
Ready to create video ads?
Turn your photos into scroll-stopping ads in minutes. No video editing skills required.
Try For Free